Sunday, February 17, 2013

Tail Light Fabrication (4/5)

Previously, I was able to shape the metal frame a bit and stage a photo. The idea of bridging the gap between the back of seat and this frame with plastic did not work out. I didn't have the right material, tools, or number of hands required and a trial run went very poorly. I realized fiberglass might fit the bill.

I took a stab at fiberglass and learned a few important things.
  • You have to have a mold.
  • You have to make relief cuts around sharp edges and corners.
Without those things, you get this:


The absence of relief cuts was not obvious - I figured the cheap matting would be very flexible when soaked in resin. It is flexible, but it also still acts like a solid sheet and resists folds and bends. No matter what I tried, it would not stick down in the corners and some edges. As this cured, it resulted in large air bubbles.

I realized how valuable a mold would have been the moment I started. Nothing I did stayed in place. Everything began to droop and slide due to gravity. This resulted in a very inconsistent and ugly shape.

Furthermore, fighting these problems cost me valuable time because the clock was ticking on getting it set up while it was still workable. Other small lessons include having a timer count minutes since I added hardener, using a disposable cup to hold resin, having paper down to protect my workbench, and having breathing and eye protection.

So, I stared at that for a couple of days before realizing it was simply no good. I decided I could do better and ripped it off to start anew. I made a mold by cutting styro-foam to fit on the inside of the frame and shaped it as desired. I test-fit the piece several times in the process. I happened to have avoided a pitfall here: Not all resins and foams are compatible. Research what you have before using it. Alternatively, create a barrier between the foam and the resign with packing tape. 


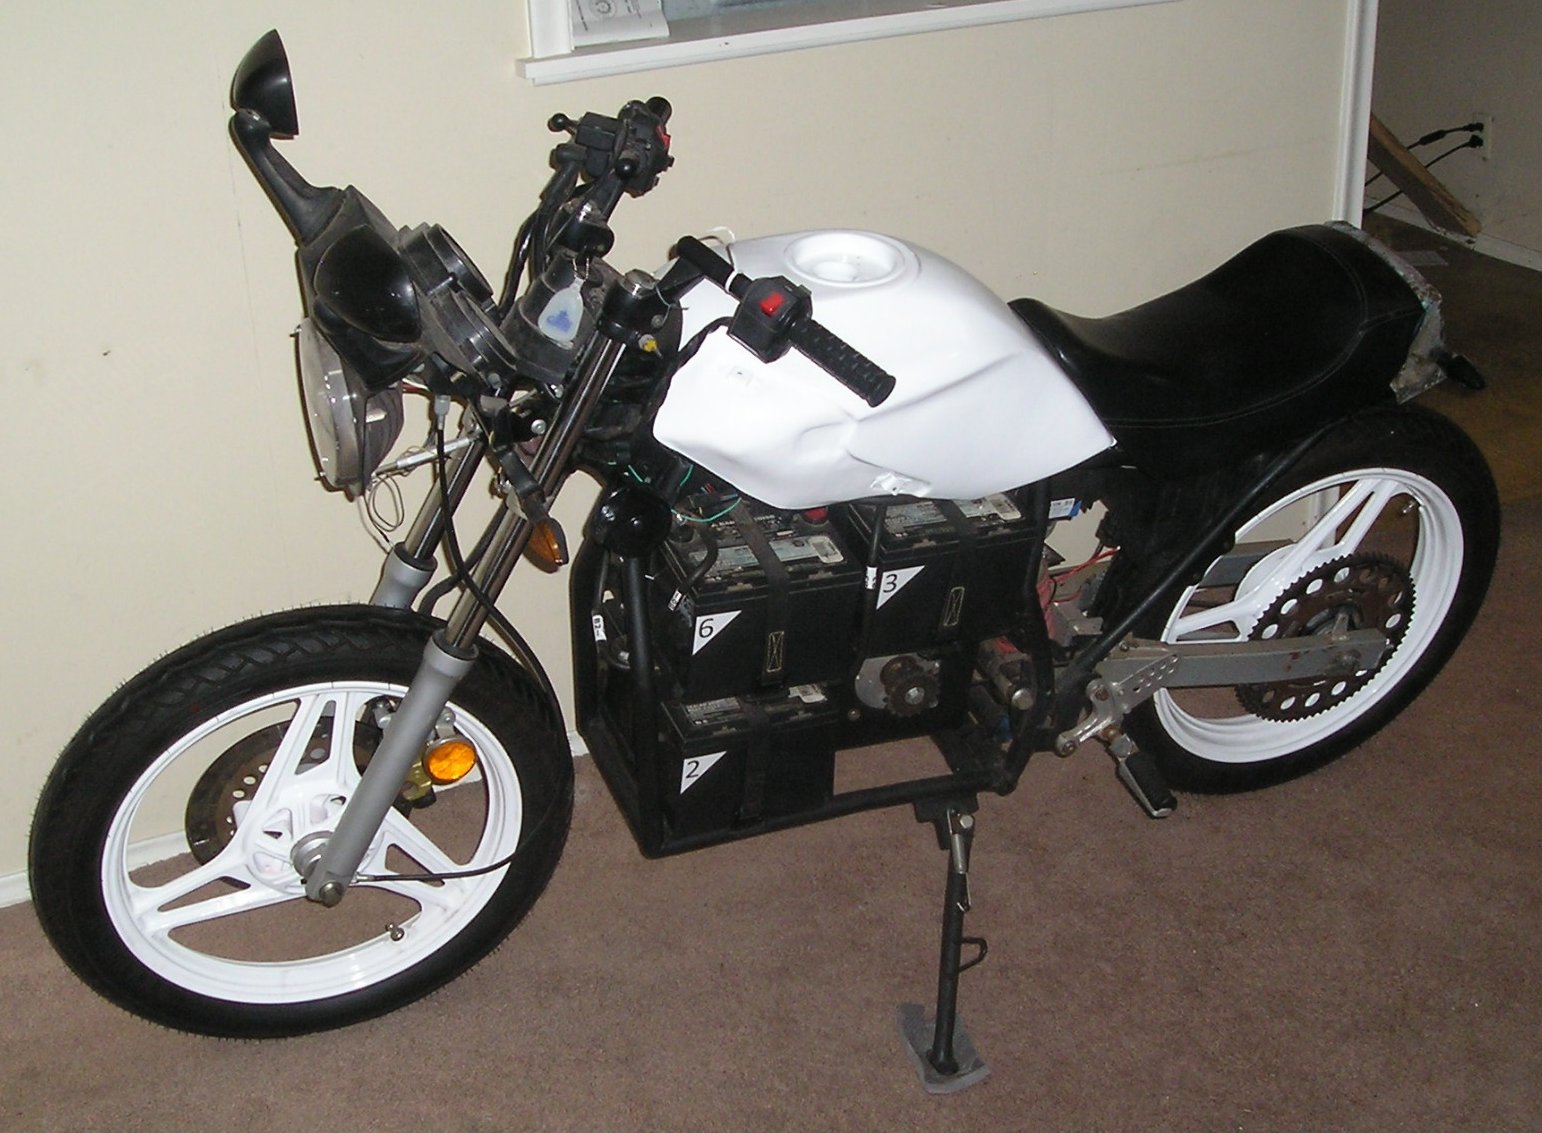
I cut many strips of mat and added relief cuts around the ones I knew were going in tight spots. The result was a much better, stronger shape with far fewer bubbles - a much more enjoyable process. After lots of sanding and some additional fiberglass work, it's starting to look acceptable.


This guy's only real job is to hug the back of the seat. It definitely does the trick at this point, so it's just a matter of smoothing it a bit more and painting it white.
-Colby

Overall Status

Since I didn't have any interesting or recent pictures in the last post, I figured I should capture some of the whole bike to share.


The tail-light assembly is coming along alright - It's ready for some bondo I think. Wiring harness is looking good. Tank may need some minor adjustments to fit like it once did.

-Colby

Saturday, February 16, 2013

Wiring Harness (2/2)

In the last two weeks:
I made a spreadsheet to document all plugs on the harness, their purpose, wire colors/styles and locations.
I removed a couple wires altogether once I double-checked they weren't in use.
I re-routed front instrument, light, and handle-bar harness plugs into the tank.
I routed the wiring harness into the tank area (was just exterior of the tank previously).
I added plug (male) for front blinkers.
I replaced one five-way and one six-way splice each with a home-made distribution blocks.
I tightened and dipped the distribution blocks in rubber.
I replaced almost all cheap and dirty splices in the harness with insulated butt-connectors.
I replaced the fuse holder on the positive wire of the 12v side of the DC-to-DC converter.

There is still a portion of the wiring harness that seems destined to be what I can only call a "bird's nest". I've had instincts to sort it out further, but the cost/benefit analysis tells me I shouldn't bother. The benefit of having organized wiring is countered by time, cost, added inefficiency.

To wrap this up, I need to:
  • Add plug (female) for the front blinkers to plug into harness
  • Mount "winker" module in a new location.
  • Additionally, what started this whole wiring harness tangent was the tail-light wiring, which still remains.
  • Attach and protect wiring harness under the tank.
  • Inspect for any bad, missing connections.
  • Clean up wires with convoluted hose and nylon holders.


Monday, February 4, 2013

Wiring Harness (1/2)

I tend to nit-pick things until I absolutely dive into them. Take the wiring harness on the bike, for example. I noticed a few wires near the tail wouldn't tuck away neatly, so I began to look at how they were routed. Then I found colors that didn't make sense, a fuse holder I didn't like, and wire that change color one or more times en-route. Next thing you know, the whole harness is off the bike - I'm pulling pins, testing connections, and removing unused wires.

I found some nylon wire organizers at ABC Auto which came in handy for laying it all out:

Before it's all over, I will probably have each wire cataloged in a spreadsheet with it's purpose. Hopefully I'll sort out a few things, fix any glaring issues, and put it back better than it was without taking forever.

Also, I've attempted to fiberglass the new tail piece. It was interesting...even the second time around. If it will cure alright, I can start cleaning it up with sand paper and lots of bondo putty. =)
-Colby